• Blog
  • Recipes
  • Lifestyle
  • Safer Skincare
  • About
  • Contact
Menu

Kate's Healthy Cupboard

Street Address
City, State, Zip
Phone Number
Healthy Lifestyle, Healthy Grain Free Recipes

Your Custom Text Here

Kate's Healthy Cupboard

  • Blog
  • Recipes
  • Lifestyle
  • Safer Skincare
  • About
  • Contact

Almond and Cashew Milks

February 23, 2012 Kate
Almond and Cashew Nut Milks

The benefit of making your own nut milks is that they don't contain any added thickeners, preservatives or other hard to pronounce ingredients.  I definitely still use the store bought boxed milks, but I like to make my own as well.  They are very easy to make and can be sweetened and flavored to your liking.  I typically make mine plain so I can use them in different recipes and sweeten them according to the recipe.  I have only made almond and cashew milk, but I think you could use other nuts as well or even sunflower seeds.

Recipe: Almond and Cashew Milk
Ingredients
  • 1 cup of raw almonds or cashews, soaked overnight and rinsed
  • 2-3 cups filtered water (depending on desired thickness) for almond milk or 4 cups for cashew milk
  • 1-2 tsp vanilla extract to taste (optional or use vanilla beans)
  • Any sweetener to taste (optional)
  • dash of sea salt
Instructions
  1. In a Vitamix or blender, combine the water and nuts
  2. Blend on high for a minute or two until almonds turn into tiny pieces and cashew milk is smooth
  3. The cashew milk is ready to go if you prefer a creamier milk
  4. The almond milk needs to be strained through a nut mesh bag (cheese cloth has too large of holes, so layer it if you try that)
  5. Store both milks in a sealed glass pitcher or jar in the refrigerator for 2-3 days

I use fresh unflavored almond milk in my Dairy Free Ranch Dressing recipe and also my Dairy Free Hot Cocoa Recipe.

Kate's Healthy Cupboard - Gluten Free Recipes
In Beverages, Recipes Tags Almonds, Beverage, Cashews, Dairy Free, Paleo
Comment

Homemade Hot Cocoa and Marshmallows

February 23, 2012 Kate
Hot Cocoa and Homemade Marshmallows

I thought this was a perfect recipe to post on a cold wintery day like today!  I love when they say we are expecting an inch over night and you wake up to 6 inches of snow!  I actually do like it since it means I get to spend the day in the kitchen!!!

As I have stated before, I loooove marshmallows.  All of us girls in the family tend to go through a bag of them in no time.  I saw a recipe for homemade marshmallows using honey and knew I had to try it.  I have to give Jenni at The Urban Poser credit for the marshmallow recipe, but I'll take credit for the cocoa recipe!

The marshmallows need some time to dry out so plan to make them a day ahead of time.  It is a pretty straight forward recipe, but I learned a few things while I was making them.  First, use a large saucepan to boil the honey and water.  You will never reach 240 degrees unless the mixture is boiling rapidly and a small saucepan will not allow for that!  I learned the hard way and watched it boil over and then watched the temp standstill for what seemed like an hour because I couldn't turn it up without it boiling over.  It should only take 7-8 minutes to get hot enough.  Second, wet your hands slightly when trying handle and cut them.  They are extremely sticky until you can get them cut and the sides can dry out.  It works well to use kitchen scissors to cut them into desired shape and size.

Follow this recipe and video for the marshmallows.  She also gives some yummy suggestions of what to coated them in for an additional treat.  It makes quite a few large marshmallows.

I make my own nut milks and used that in this recipe.  You can certainly used boxed non-dairy milks instead.  Make sure to read my notes under variations if you use boxed milks.  The cocoa recipe makes one cup so feel free to double it like I do so it fills my venti size mug!

Recipe: Hot Cocoa
Ingredients
  • 1 cup homemade nut milk*
  • 2 tbsp full fat coconut milk (optional, but makes it creamier)
  • 1/4 tsp vanilla extract
  • 1 - 1 1/2 tbsp Lakanto or Wholesome Sweeteners Zero or Coconut Palm Sugar*
  • 2 tsp cocoa or cacao powder
Instructions
  1. Combine all of the ingredients in a Vitamix or blender and blend until combined. This mixes it best and makes it a bit frothy.
  2. Pour mixture into a sauce pan and bring it to just about a boil.
  3. Reduce heat and simmer for a couple minutes, stir it while it simmers.
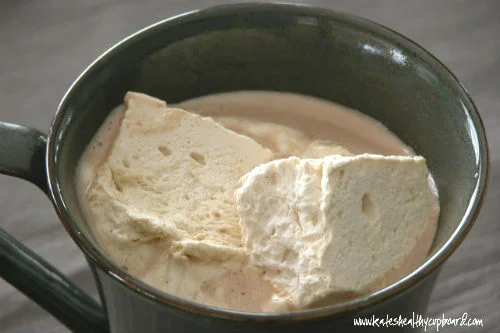
  4. Pour into a mug, top with marshmallows and enjoy!
Quick notes

*I make my own almond and cashew milk to use in recipes.  You can certainly use a boxed almond or coconut milk. If you use a vanilla flavored milk, you may want to omit the vanilla extract and reduce the sweetener.

*Remember that the marshmallows will add additional sweetness.

Variations

You could add any extracts besides vanilla for a different flavor.  I would suggest almond, peppermint, coconut, orange or hazelnut.  You may need to add a smaller amount, especially with peppermint!

For a higher protein drink, add some vanilla egg white protein or vanilla whey if you can tolerate dairy.  Blend it with all the other ingredients.  Some brands may clump when you heat it, add the hot mixture back into the blender before serving.

Let me know how you choose to flavor it!!!

Kate's Healthy Cupboard - Gluten Free Recipes
In Beverages, Desserts, Recipes Tags Beverage, Chocolate, Dairy Free
2 Comments

Dairy-Free Eggnog

December 8, 2011 Kate
Dairy Free Eggnog
Dairy Free Eggnog

Holiday favorite to many, including myself.  I can't imagine downing a glass of the real stuff right now.  My stomach, sinuses and skin would hate me for days!!!  As good as it tastes, it's so not worth it.  I was thrilled to see So Delicious come out with their eggnog this season made from coconut milk.  I was not thrilled to see the amount of sugar in it.  Inspired by a few recipes out there, I decided to take on the challenge of creating my own and liked the result.  It's not as thick and heavy as regular eggnog, but it's better on the belly!

Recipe: Dairy-Free Eggnog
Ingredients
  • 9 egg yolks
  • 4 cups non-dairy milk I used a mixture of vanilla unsweetened coconut milk and almond milk)
  • 1 can full fat coconut milk
  • 1 1/2 tsp nutmeg
  • 30 drops stevia or additional swerve
  • 1 tbsp vanilla extract
  • 2 vanilla beans or 1/4 tsp vanilla bean powder
  • 1/2 cup Swerve or other granulated sugar
Instructions
  1. Separate the yolks into a mixing bowl, whisk and set aside (you can save the whites to make a whipped topping)
  2. In medium size pot, combine everything but the yolks
  3. Cook on medium heat stirring often so milk doesn't burn. Once it reaches a boil, cook for 5 more minutes
  4. Turn heat to low and add half the mixture to bowl of yolks, whisking to combine. Pour that bowl back into pot and cook for 5 more minutes
  5. Chill and serve plain or with booze

Topping:

  1. Whisk egg whites with a bit of maple syrup or coconut sugar until small peaks form
Quick notes

You can also use homemade almond or coconut milk but I think the milks I used added a bit more vanilla flavor to it.  If you don't have vanilla beans, add a little more extract to taste.

Variations

This could be sweetened with maple syrup or coconut sugar as well.

If you want to try Swerve or need to order more, use coupon code KATE10 for a 10% discount.  Swerve is my favorite sugar replacement.  It is the only sugar alcohol that will not cause tummy troubles and it does not raise blood glucose levels.

If you are an Amazon shopper, would you be so kind to use my affiliate link to make your purchases.  It is at no cost to you, it does provide a tiny kickback to Kate’s Healthy Cupboard.  This allows me to continue making and testing recipes for free.  Thanks so much!!

*I have recently switched all of my skincare and makeup to a company that is free of 1,500 chemicals!!  I am so particular about what goes into my body, I need to be just as picky as to what goes on my body!  Your skin is your largest organ and absorbs chemicals into the bloodstream faster than the gut does!  I am vain when it comes to my skin and was so thrilled to find products that are anti-aging and work!!!  Check out BeautyCounter for more info!!  You will love it!!

Cheers!

Kate's Healthy Cupboard - Gluten Free Recipes
In Beverages, Recipes Tags Beverage, Coconut Milk, Dairy Free, Holiday, Primal
4 Comments
download.jpeg

Welcome to Kate's Healthy Cupboard! A place for healthy, grain free recipes, some low carb recipes, safe beauty and products for the home  and more...


>>  CONNECT WITH KATE  <<

pinterest.png
facebook.png
instagram.png

>>  SUBSCRIBE  <<

Success! Now check your email to confirm your subscription.

There was an error submitting your subscription. Please try again.


>>  SEARCH RECIPES  <<


Copyright 2016 Kate's Healthy Cupboard  ||  Website Design